
Jumbleberry Blast Tips and Tutorial
Hello Kinz Friendz! For those of you interested in completing the Jumbleberry Blast game and winning that non-tradeable trophy, I have created a tutorial with tips to help you through. This is my favorite game in Webkinz, and I have completed it many times. The reason I love it is because it’s 90% strategy, 10% luck (yes, I pulled those percentages out of nowhere). In my experience, if you understand the strategy, you can win this game over and over (although still be prepared for losses). It’s a tough game to conquer, which makes it all the more rewarding when you do!

Due to the strategic nature of this game, this will be a long tutorial, so sit back and get comfy! I’m including photos to help you visually grasp the concepts as I go. We will start with a basic overview of the game. Then I will go step by step through an analysis of several different levels, which is necessary because there is not simply one goal that gets more and more challenging as the game progresses. There are multiple goals. I will offer tips along the way. In the end, if you still have questions or need clarification, please ask! I would love to see you all win the trophy!
Overview
Jumbleberry Blast is a series of 30 levels based on the Webkinz Jumble Berry Fields game, and it is only available to deluxe players. In Jumbleberry Blast, the goal is to clear boards and gain points by removing strings of jumble berries, sugar berries, pickle berries, moon berries, and blue berries. As far as I can tell, there is no point increase based on the TYPE of berries you remove. Whereas the value of moon berries is higher than jumble berries in Jumbleberry Fields, all colors appear to give the same amount of points in Jumbleberry Blast.
In Jumbleberry Blast, there are four main objectives, and those objectives change or get intertwined from level to level. This means that your strategies must change throughout the game. What serves you well on one level will not work well on all levels. However, there are certain tips that you will use throughout the game, and I will explain those as we go.
You start out with 3 “lives”, that is, 3 chances to successfully complete the game. You cannot gain any extra lives. It is very important to save these fails for the last few levels. Tip: If you use a life by unsuccessfully completing a level early in the game, start over. There is a good chance you’ll need all of them later in the game.
Four primary objectives:
1. Clear berries to collect a certain number of points within a certain number of moves. This is the easiest objective. For example, in level one you must get 100 points in 7 moves.

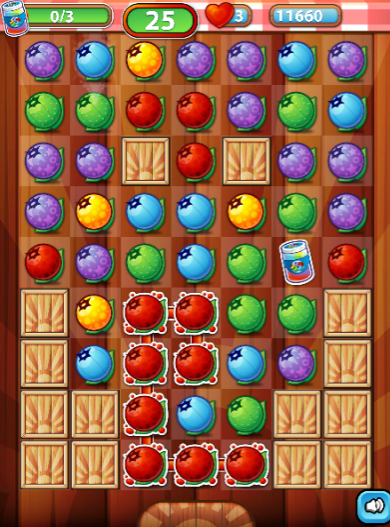
The box on your left is your meter showing you how close you are to reaching your goal. The second box is how many moves you have left. The third box is the number of “lives” you have. The fourth box is how many points you have. The amount of Kinz Cash (KC) you receive is based on the number of points.
2. Clear all the rot within a certain number of moves. On these levels, some berries are on squares of green “rot”. All rot must be cleared from the board to complete the level. Often these levels do not give you a lot of moves, so you must clear multiple pieces of rot with each move. Hint: These boards never change. The color and sequence of the berries will change each time you play the game, but at each level, the rot “map” is always the same (same number of rot squares in the same location). So once you figure out the strategy for each level, you know it can be replicated.
3. Collect the falling jars. In these levels, you will start out with either 3 or 4 jars, which must work their way from the top of the screen to the bottom and fall through within a certain number of moves. Some of these levels provide many opportunities to clear the jars, but be cautious! If you’re not careful, you can get trapped at the bottom with no way out.
4. Clear the bees. Bees love berries! Clear the bees to release the jars of berries or to collect points, depending on the level.
With these four objectives in mind, let’s look at some strategies. Note: This game can be played on a desktop computer or on a mobile app. Tip: I find that it is easier to play on a device with a touch screen. I use my smart phone app with a stylus on the touch screen. Creating chains of berries with one fluid motion is much easier with a stylus than a mouse. Warning: I have won the game on my phone app many times and it has not updated within Webkinz World and I did not receive the high score or win the trophy. Last I heard, Ganz was working on getting that fixed, but I don’t know where that stands. Particularly, if you’re not connected to WiFi, the mobile game may not sync with the computer game.
One more thing to note in the overview is that there are two ways you can play this game. If you just want to complete the game as quickly as possible to get the trophy, you can move much faster through the levels. However, your score will be pretty low and the KC payout is poor. If you work through the game more slowly, your points will be higher and the KC, if you make it to the end of the game, will be over 250. Because I’ve already won the trophy, I like to work through the levels slowly to beat my high score, which is over 46,000 on my main account. For the sake of this tutorial, I will move through it quickly to highlight the strategy, so my end game score will be relatively low. To work through it quickly, simply complete each level’s goal in as few turns as possible. To increase your score, utilize every turn on every level to maximize as many points as possible. The bonus of 10 points for each unused turn per level is nothing compared to the points you can make with a long chain of berries on each level. For example, if you finish a level with 10 extra moves, you get 100 extra bonus points. Use those 10 moves to make long chains and multiple shining berries (more on that in a minute), and you could easily get several hundred points. Do this with each level, and by the end, it will be the difference of completing the game with 30,000 points versus 46,000 (maybe more!).
General Strategy
For me, the first 9 levels are extremely simple. You are prompted with your objective, and each time the objective changes, you are told what to do. The most important tool of the entire game is introduced in level 4, where you are shown how to spawn a shining berry by creating a chain of 7 or more! You cannot win this game, at least in my experience, without grasping and utilizing this concept throughout the 30 levels.
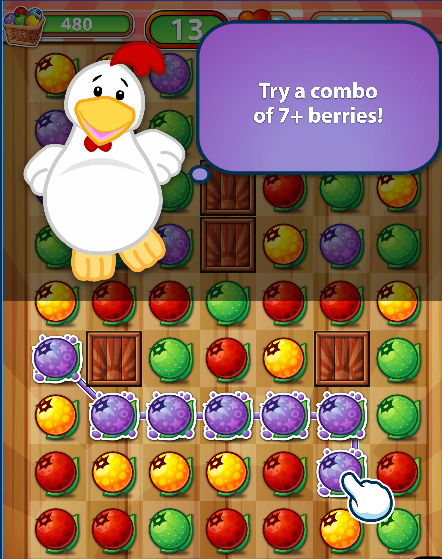
When you make a chain of at least 7 berries of any color, you will get a “shining” berry:
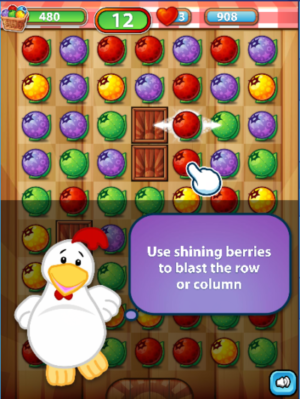
In this picture, the shining arrows on the berry point horizontally. This means that if you make a chain using that shining berry, it will also clear that entire row horizontally. Sometimes the shining arrows point vertically. In those instances, when you make a chain with that berry, you will clear the entire vertical column. This gives extra points because the shining berry itself is worth more than a regular berry, plus you get credit for the row or column you blast as well as the chain you make.
Hint: For every 7 berries you chain together, you get one shining berry, so if you can chain together 14 berries, you will generate two shining berries, and for a chain of 21 berries, you will get 3 shining berries.Â
Tip: If your goal is higher points, try to only create chains divisible by 7. If you create a chain of 7, you get a shining berry. If you create a chain of 13, you still only get one shining berry. Create two separate chains of 7 to create 2 shining berries if you are not able to create a chain of 14. If you do not care about increasing your score, create chains of any size as long as they are 7+.
If you create a chain of 7+ berries and one of the berries in the chain is a shining berry, you will get the blast for the berry you used, but you will generate another shining berry! Tip: Use your shining berries to hit other shining berries. You can create a “chain reaction.” Look at the photos below:
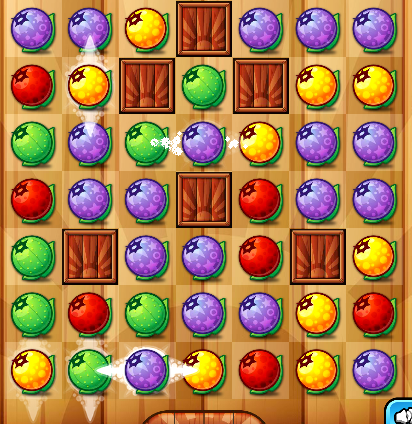
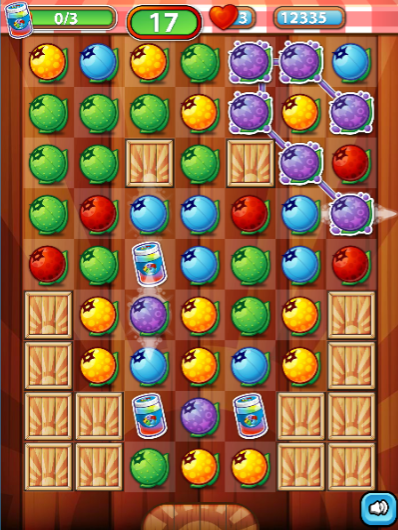
There are 5 shining berries on this board – three at the bottom, a purple one in the middle, and a yellow one in the upper second column. It is difficult to capture all of them in a screenshot because they are all flashing, but look at the next photo.
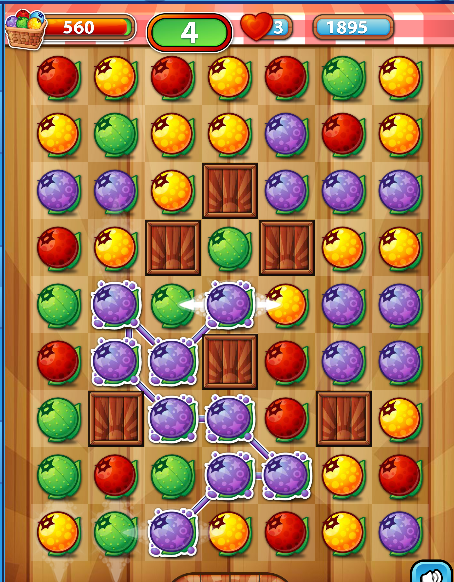
If I make the chain of purple berries at the bottom, I will use two horizontal shining berries and clear both of those horizontal rows. The purple berry in the bottom row with the horizontal shining flashers will hit the two vertical shining berries to the left of it and clear both of those columns.
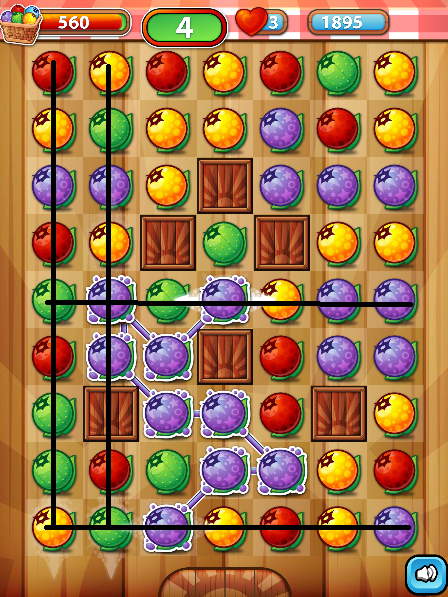
The black lines indicate the rows and columns that will be blasted when this purple chain is made. The yellow berry in the second column, fourth row down is also flashing (the screenshot didn’t capture it). That one will also be hit by the vertical green shining berry at the bottom of its column. Because the yellow berry’s flasher is vertical, it will not clear anything additional, but you will get extra points for hitting another shining berry. Also, because my new chain of purple berries is at least 7, I will generate another shining berry.
Tip for increasing your points: Don’t blast your shining berries as you create them, unless you need to so you can get other stuff out of the way. Save them throughout the level, and clear berries below to line them up to create a chain reaction. When you have one turn left or have almost met your goal, blast a series of chains like this to optimize points on your last turn.
Once you understand this concept, you can strategically create chains to clear rows when you need them during the rot, jars, and bee boards. There are certain boards (like level 27) that are virtually impossible to clear without utilizing shining berries to blast rows, and you have to get the shining berries where you need them in a limited amount of turns. Even when you understand this concept, the game is very challenging, but it is winnable! I promise!
Many of the levels in this game are easy. It is not like most games where each level gets increasingly more difficult. The first 9 levels are very easy. For me, level 10 is where it starts to get tricky. You have to clear 18 pieces of rot in a maximum of 10 moves. However, if you make it through level 10, you are back to simply making chains for points, and you have plenty of turns. Levels 11 and 12 are super easy. Level 13 introduces you to the falling jars, and it is very easy. Levels 14, 15, 16, 18, 20, 24, 25, and 28 are also dropping jar levels, and while some are more challenging than others, they are all moderately difficult because there are objects in the way, crates in the earlier levels, bees in the later levels. In level 17, they decided to mix it up by bringing a board of rot back instead of jars. Besides the easy rot boards early in the game, levels 10, 17, 23, 27, and 29 are also rot boards, and they are much more difficult. You have relatively few chances to clear all the rot squares from the board.
For me, level 27 is always the trickiest. If at all possible, go into level 27 with all three “lives” because there is a good chance you will need them all to complete that level. Levels 28 and 29 are also a bit tricky, but not as bad as 27. And if you make it through 29, you’ve made it! Level 30 is a freebie! I don’t think it’s even possible to lose on level 30, unless your internet connection goes out or something. Levels 1-9, 11, 12, 13, 19, 20, 21, 22, 26, and 30 are super easy. They are good opportunities to focus on accumulating points with little risk of failing the level. Going into the game with this in mind may help it seem less overwhelming. There are 30 levels, but only 12 of them (IMO) are challenging. The other 18 are very easy. With this overview in mind, I am going to walk you through a few difficult levels. I wish I could put this into a video because this will be a lot to scroll through and analyze, but I don’t know how to do that. For the most part, the rest of this tutorial is a series of pictures. I will interject text to explain certain moves and to offer specific tips related to those levels.
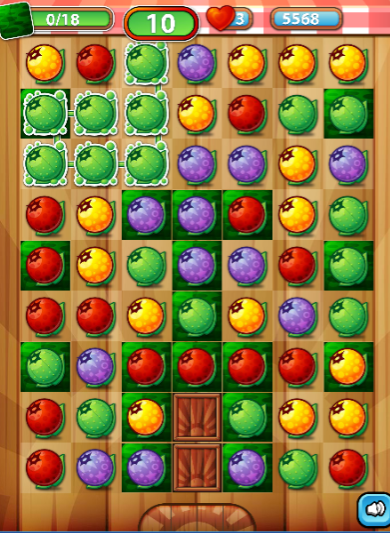
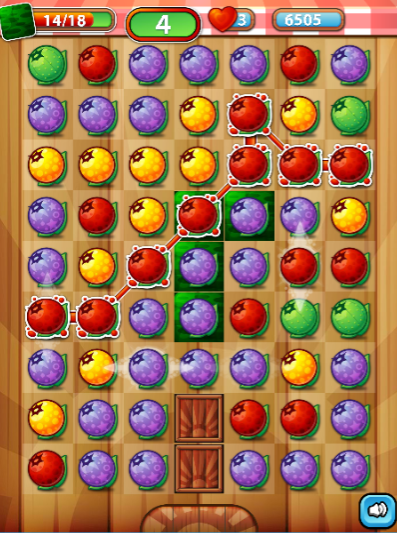
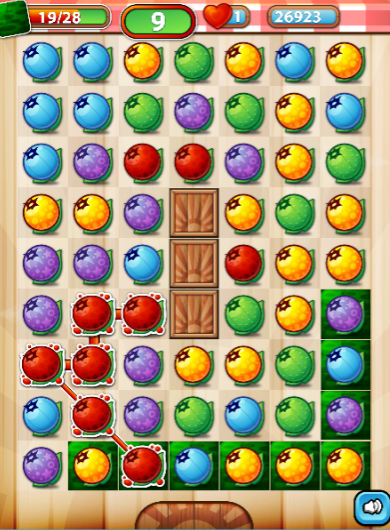
Level 10: This is where the game starts to get challenging (for me). The objective: Remove 18 pieces of rot in 10 moves or less. The board looks like this:

The middle section of rot is fairly easy to clear. The ones on the side, especially the two at the top, can tank this level if you don’t get them early. Tip: Try to remove the side pieces early, and work from top to bottom, always remembering to create chains of at least 7 when possible. This is a general tip. Sometimes it is better to start in the middle.

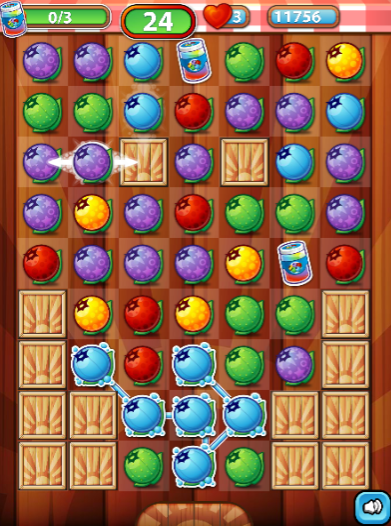
Do you see how my first chain cleared one piece of rot at the top and gave me a shining berry at the bottom? Now my second chain is more than 7, so it will give me another shining berry.
This chain won’t give me a shining berry, but I can clear two side berries in one move.

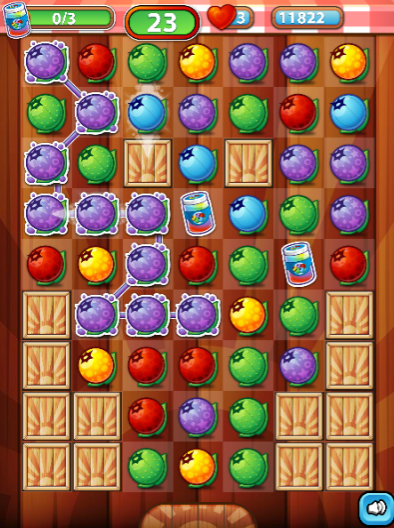
Oh, look at all those beautiful sugar berries! This chain is over 14, so it will give me two shining berries, and it clears 2 pieces of rot!

I am half way through my goal, and I still have 6 turns left. Notice that there are a lot of green and purple berries? By clearing out so many yellows in the chain before, I left a lot of green and purple, making it easier to make more super long chains. There are lots of directions I can go here because I’m in pretty good shape, but I am going to go ahead and get rid of those yellow ones on the side.
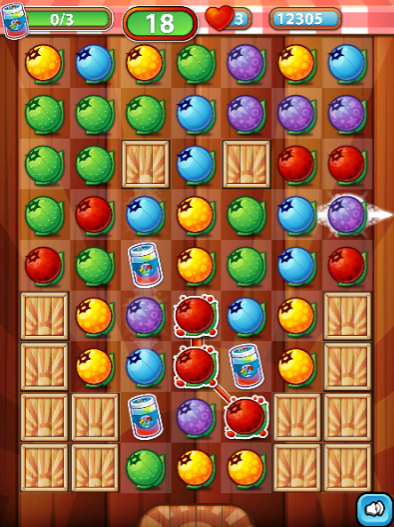
I am not worried about those disconnected moon berries on the bottom because my pickle berry at the bottom is shining horizontally.
My rot squares only have purple and red at this point, and I can easily make a chain of either. I opt to go with red because it is on top. If I pull the purple out from below, I do not know what I will end up with. You never want to get stuck with a lone color berry in a piece of rot during the last round of the level.
Why do I have a sugar berry in that last rot spot instead of a moon berry? I went for red thinking purple would be stable and I could get the rest on the next round, but I didn’t account for the red vertical shining berry in the left column on the previous move. Hint: When you blast a vertical column, everything shifts left. When I cleared the red chain, the vertical shining berry in the left column caused everything to shift left, and I ended up with a lone sugar berry in the rot spot. Thankfully, this is not my last round, so hopefully I can get out of this!
Phew! Clearing that large chain of moon berries left me wide open, not knowing what would fall into place. I got lucky, and I can finish this level in 9 moves. Had I anticipated everything shifting to the left with that earlier move, I could have avoided the shining berry and finished in 8 moves. Tip: Even if you’re using all rounds in a level to increase your points and score, try to get yourself into a winning position as early as possible, so that on the final round you simply have to clear the last piece.
If I go through all the difficult levels, this tutorial will be a mile long, so I’m only going to hit a few of the most challenging. However, if any of you need a walk through of any specific level, just ask. I can add pictures of more levels later.
Let’s look at those pesky jars! Levels 14 and 15 are challenging, but 16 and 18 are even more difficult (for me). Level 17 narrows at the bottom, and level 18 has quite a few crates obstructing the path. In both of these levels, the key is not getting all your jars trapped at the bottom with no way out. If you do, the only chance you’ll have to succeed the level is if you get lucky enough to spawn a shining berry that clears your path.
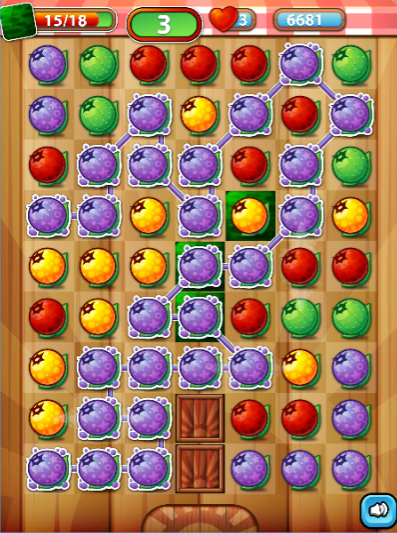
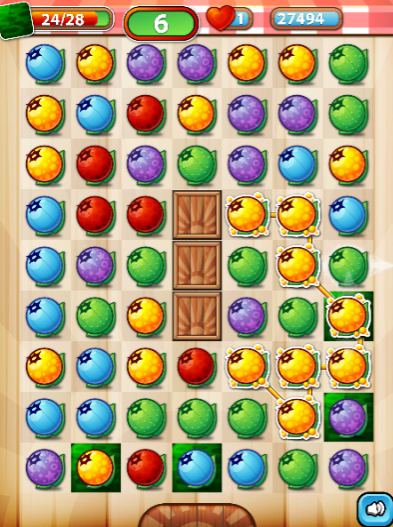
So let’s work through level 17, but again, if anyone needs more help with 18 or any other level, let me know and I’ll work through that one with you. In level 17, you have 27 moves to drop the jars through the narrowed opening at the bottom. It looks like this:
On the first move, I’m able to make a chain of 7 and spawn a shining berry.
The blue berry, second column, first row is shining vertically. Now I’m going to create another chain of 7+ berries to create another shining one.
Now I have a purple horizontal shining berry in addition to my vertical blue shining berry, which has shifted to the 2nd row, third column.
Here I will use the horizontal shining moon berry to clear that row, but because it is included in a chain of 7+, it will spawn another shining berry!

My blue shining berry has shifted down and to the left, and I have a new horizontally shining moon berry. All three jars are on the board. I want to keep them from getting bottle necked at the bottom.

Notice how the blue vertical shining berry is in the path of the horizontal shining moon berry, and two jars are in the path below the blue berry. If I were to blast that purple berry now, I could explode all of them, but I still have the jar to the right to get out. So I’m going to work it down first.

I messed up a little here, forgot to grab the moonberry under the top left jar, which would have given me another shining berry. That’s what happens when you try to create tutorials at midnight! It’s ok though. This level is very generous, and we are still in a good spot!

Let’s see what this long chain gives us!
Now I have the moonberry that I missed earlier, in the same column as the blue berry, shining vertically.
I’m going to go ahead and do what I probably should have done a few turns earlier and use my horizontal shining berry to knock out the jars in the column with the vertical shining berries. I probably wasted a couple turns here, but in the end, it won’t hurt us.

With 16 moves left, we’re already there. We’ve collected 2 of the jars, and the third jar is perfectly positioned with three sugar berries beneath it. So we can end this round right now and finish up with 150 bonus points (you get 10 bonus points for each turn you don’t use), or we can play this game out, careful to not disturb the row of the 3 on the bottom. By creating long strings and blasting rows with shining berries, you could milk a lot more points out of this level than by ending it now.
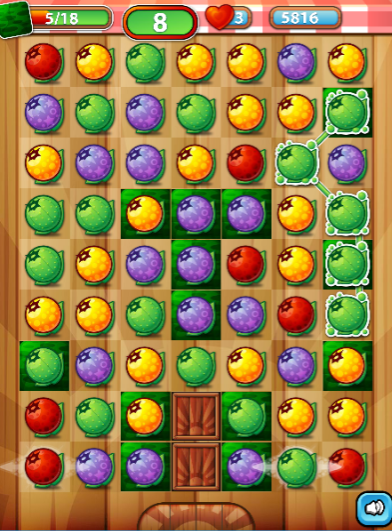
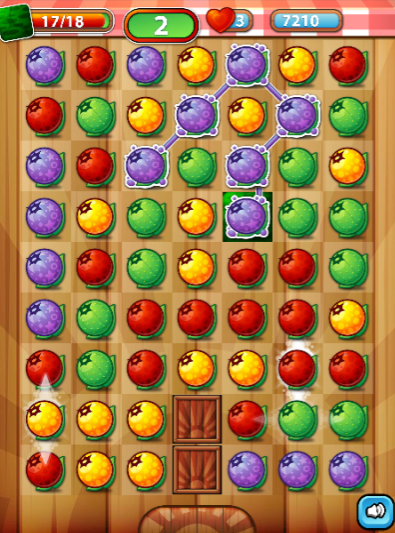
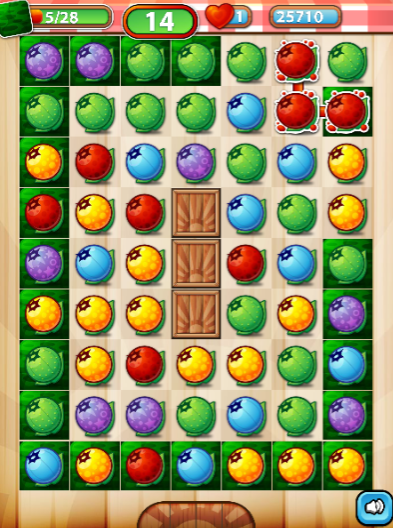
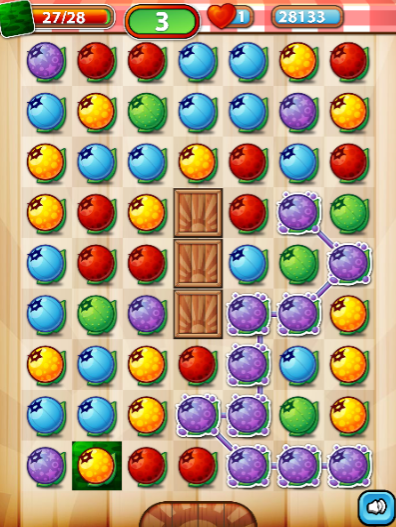
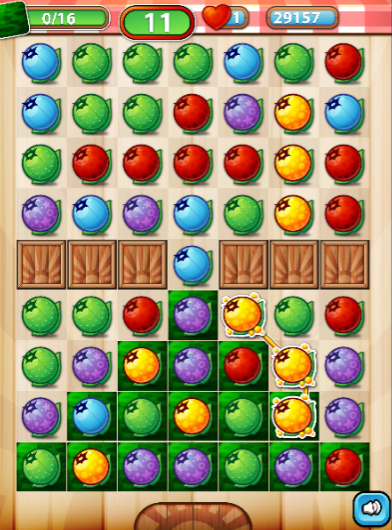
Let’s skip ahead to level 27, which is always the most difficult level for me. Other levels can be challenging too, and as you may observe in the photo below, I’ve arrived at level 27 with only one chance to make it, which is not a great position to be in. This level requires a fair bit of luck combined with strategy to succeed.

We only have 15 moves to clear 28 pieces of rot. Hint: You must use shining berry blasts to complete this level, and whenever possible, line up horizontal berries to blast out the bottom row, and vertical berries to blast out the side columns. The top row generally has to be cleared individually, unless you just happen to get lucky enough to spawn a horizontal shining berry in the top row next to two other berries of the same color. That rarely happens. So I prefer to go for the top berries and work my way down.

Right off the bat, I see that I have a couple nice long green and yellow chains, so I’m feeling optimistic about my chances with this level. You don’t always get that starting out. However, if I start with one of those chains, I’m going to lose that nice smaller chain of reds in the upper right corner. By starting there, I can clear 5 pieces of rot in my first move, and 3 are from the top row. So let’s start there!
Random cute contest pet insert (temporary): Will be removed.


Now I will pick up that green chain.

I still have a nice yellow chain down there, but I’m working from the top down, and this lovely blue chain has appeared.
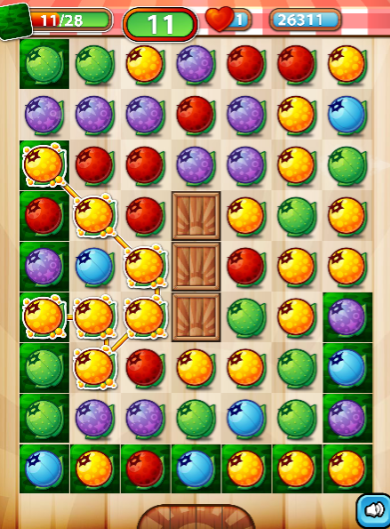
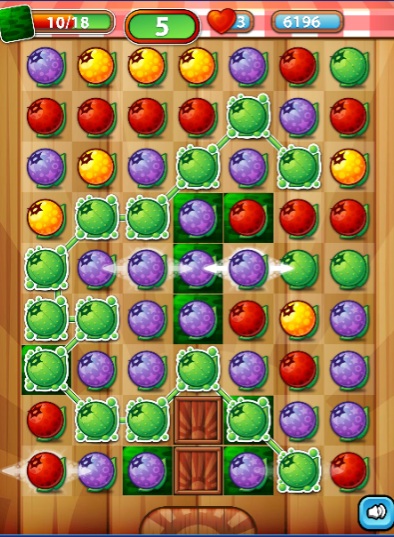
With the chain of yellow berries in the last move, this pickleberry in the left column became a vertical shining berry, and this is what you need to win this level. Now I can clear that whole row!
We now have 9 pieces of rot to clear in 9 moves, so our odds are improving!

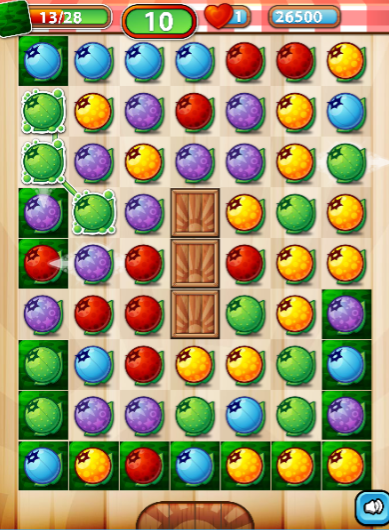
With this move, none of my berries are covering rot, but the moon berry in the left column, third from the bottom is a horizontal shining berry. The blue berry in the right column of that row may be difficult to chain, so I’m going to blast that row to clear that blue berry, and I am making a chain of 7, so I will spawn another shining berry.

And bingo! Another vertical shining berry on the right column now. I’m not going to use it yet though. If I blast that row, I’ll lose the yellow berry in the right bottom corner, and I need that to clear those three, so let’s do that first. Because I’m only pulling out one horizontal row, there is no concern that the shining berry will shift left. They will come straight down.

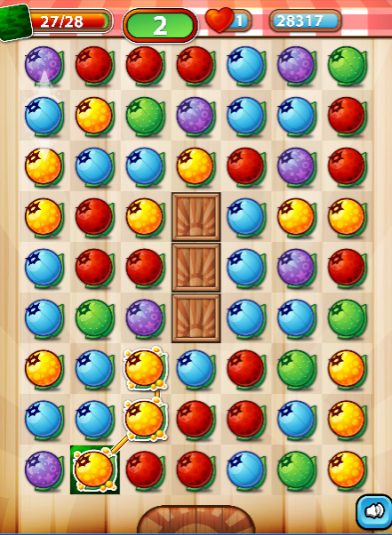
This move will set me up to win the game. I have 5 moves left. By clearing this green chain, I will bring two sugar berries in the third column down to connect with the sugar berry in the 2nd column, and simultaneously, I will drop a blue berry in the sixth column down to connect with the blue berries in the bottom row. Let’s do it!

As long as I keep my small yellow chain intact, I can use these last couple turns to make large chains and increase my score.
If you make it through 27, you’re in pretty good shape! Levels 28 and 29 are a little tricky. I’m just going to post one picture of each so you can see what the board looks like. I have lost the game on 29 a couple times, which is very disheartening, so if anyone needs a walk through of either of those levels, let me know.
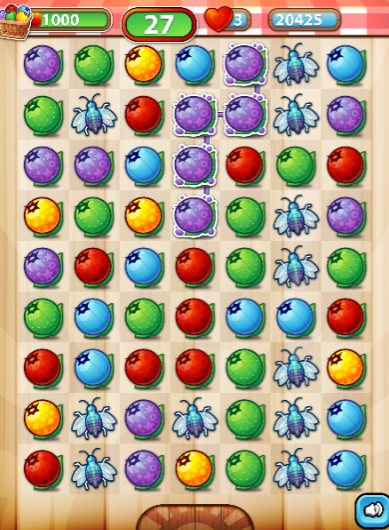
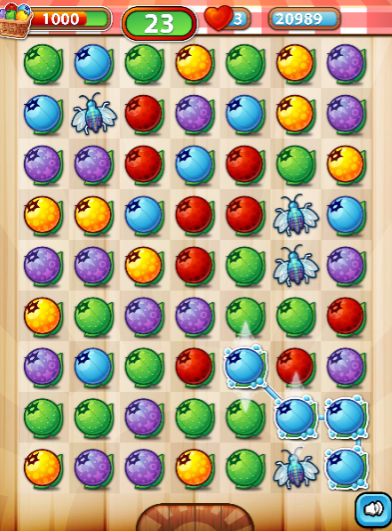
Level 28 looks like this:

Long chains can be difficult to make on this level due to three solid rows of flies. Hint: when you blast a row or column with a shining berry, flies on each side of the blast, as well as flies in the path of the blast, are removed. For example, if one of the moon berries in the second column was flashing vertically, and I used the chain of three moon berries to blast that column, the blast would clear the entire second column of berries and flies, but the flies in column 1 and 3 would also be removed and berries will fall into their places. Once the flies are cleared, just get the jars to the bottom like you did earlier.
Level 29 looks like this:
You only have 11 moves to clear these, and with the bottle neck in the middle, you often don’t know which color berries will fall through, so this level can be tricky, but you can do it!
And the good news: If you make it through level 29, level 30 is a freebie! It’s a chance to collect a few extra points and bump your score! And then….

You get the Choogles Dance!

The what??? The Choogles Dance! When this game was first released, there was a discussion on Webkinz Newz. One poster insisted this is not really a chicken, Ganz just took the white googles and put a chicken head on it, but others argued that it was a chicken, and one little peace keeper proposed a compromise. It’s a Choogles – a googles with a chicken head. And since then, in our family, this creature has been known as the Jumbleberry Blast Choogles! And he dances when you make it to the end!

I moved through the game quickly for the sake of this tutorial, so my score is only 31,278. My high score is over 46,000, so you see, utilizing every move with points in mind can crank your final score up a lot!
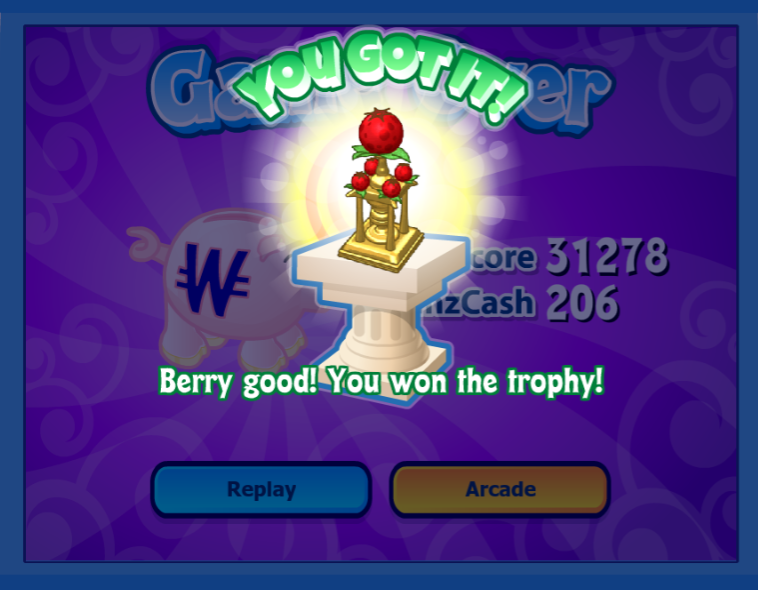
And then comes the lovely trophy!

And because I completed the game just after midnight, Jaycee got the high score of the day even with a relatively low score!
I hope this tutorial helps you learn some new strategies and win this super fun game. I am a trophy collector, so I know how exciting it is to put a new one in my room. If there is anything I can do to help you through a level or through the game, please ask. Happy berry blasting!
Addendum: In response to a request, below is a walk through of level 26.Â
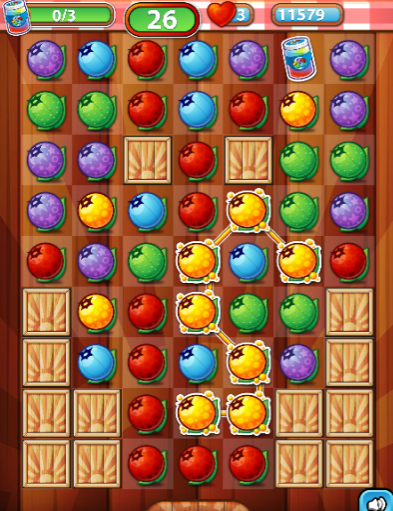
Level 26 looks like this:


Look for opportunities whenever possible to make chains of 7+.
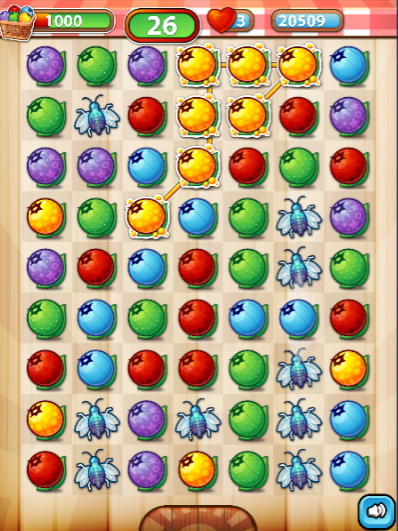


Use your shining berries to blast bees in the path of the arrows and in the rows next to the shining berries.

If anyone needs additional levels added, please ask, and I will add them!